So richten Sie Ihr erstes EV-Ladegerät stressfrei zu Hause ein
Einleitung: Erstbesitzer eines Elektrofahrzeugs wissen oft nicht, wo sie anfangen sollen
Bei vielen Erstkäufern eines Elektrofahrzeugs (EV) geht die Begeisterung für das Elektrofahren oft mit Verwirrung und Angst einher – insbesondere, wenn es um die Installation einer Ladestation zu Hause geht. Häufige Fragen sind:
-
„Kann ich dieses Ladegerät selbst installieren?“
-
„Funktioniert meine vorhandene Steckdose oder brauche ich ein Upgrade?“
-
„Ist das Laden der Stufe 1 für meinen Lebensstil zu langsam?“
-
„Ist es sicher, es an eine normale Steckdose anzuschließen?“
Dieser Artikel soll Ihnen diese Sorgen nehmen, indem er eine klare, schrittweise Installationsanleitung für EV-Ladegeräte der Stufe 1 bietet. Egal, ob Sie einen Tesla mit einem J1772-Adapter oder einen Chevy Volt mit einem NEMA 5-15-Stecker laden, diese Anleitung hilft Ihnen, fundierte Entscheidungen zu treffen und unnötige Kosten zu vermeiden.
1. Was ist ein EV-Ladegerät der Stufe 1?
Das Laden von Elektrofahrzeugen der Stufe 1 ist die einfachste Form des Ladens von Elektrofahrzeugen. Dabei wird in der Regel eine normale 120-V-Haushaltssteckdose verwendet und es wird langsames, aber gleichmäßiges Laden ermöglicht, wodurch die Reichweite je nach Fahrzeug und Ladeleistung um 5–8 Kilometer pro Stunde erhöht wird.
Typische Komponenten sind:
-
Eine tragbare EVSE (Electric Vehicle Supply Equipment)
-
Ein Standardstecker (normalerweise NEMA 5-15)
-
Eine Steuerbox mit Sicherheitsschaltung
-
Ein J1772-Anschluss oder Tesla-Adapter
2. Was Sie vor der Installation benötigen
A. Kompatible Wandsteckdose (NEMA 5-15)
Die meisten Ladegeräte der Stufe 1 werden direkt an eine NEMA 5-15-Steckdose angeschlossen – die gleiche Art, die auch für Lampen und Laptops verwendet wird. Das ist ideal für:
-
Hauseigentümer in Einfamilienhäusern
-
Mieter mit Zugang zu einer geerdeten Steckdose im Freien
-
Preisbewusste Fahrer, die kein Schnellladen benötigen
⚠️ Warnung: Vermeiden Sie die Verwendung abgenutzter oder nicht geerdeter Steckdosen. Diese können bei langen Ladevorgängen überhitzen.
B. Überprüfung der Stromkreislast
Obwohl Ladegeräte der Stufe 1 nur 12–16 Ampere ziehen, ist es wichtig sicherzustellen, dass der Stromkreis nicht überlastet ist .
Tipp: Verwenden Sie einen dedizierten Stromkreis mit 15 A oder 20 A. Vermeiden Sie Steckdosen, die Sie mit Geräten wie Mikrowellen oder Heizgeräten gemeinsam nutzen.
C. Wetterfestigkeit (bei Außenbereich)
Wenn Sie im Freien laden möchten, stellen Sie Folgendes sicher:
-
Die Steckdose verfügt über eine wetterfeste Abdeckung
-
Der Steckerbereich ist vor Regen und Schnee geschützt
-
Ihre EVSE ist UL-gelistet und für den Einsatz im Freien geeignet (IP65 oder besser).
3. Schrittweiser Installationsprozess
Schritt 1: Wählen Sie den Ladeort
Wählen Sie einen Parkplatz in der Nähe einer vorhandenen 120-V-Steckdose . Idealerweise:
-
Innerhalb von 20 Fuß vom Ladeanschluss des Autos
-
Wettergeschützt (am besten in der Garage)
-
Abseits von Fußgängerverkehr (Stolperfallen vermeiden)
Schritt 2: Überprüfen Sie die Steckdose
-
Auf Erdung prüfen
-
Achten Sie auf festen Sitz des Steckers
-
Stellen Sie sicher, dass der Stromkreis nicht überlastet ist
🛠️ Empfohlenes Werkzeug: Ein Steckstromkreistester (ca. 10 $)
Schritt 3: Schließen Sie das Ladegerät an
-
Stecken Sie den NEMA 5-15-Stecker in die Steckdose
-
Warten Sie, bis die Kontrollbox aufleuchtet (Bereitschaftsanzeige)
-
Stecken Sie den J1772-Stecker in Ihr Elektrofahrzeug (oder verwenden Sie einen Tesla-Adapter).
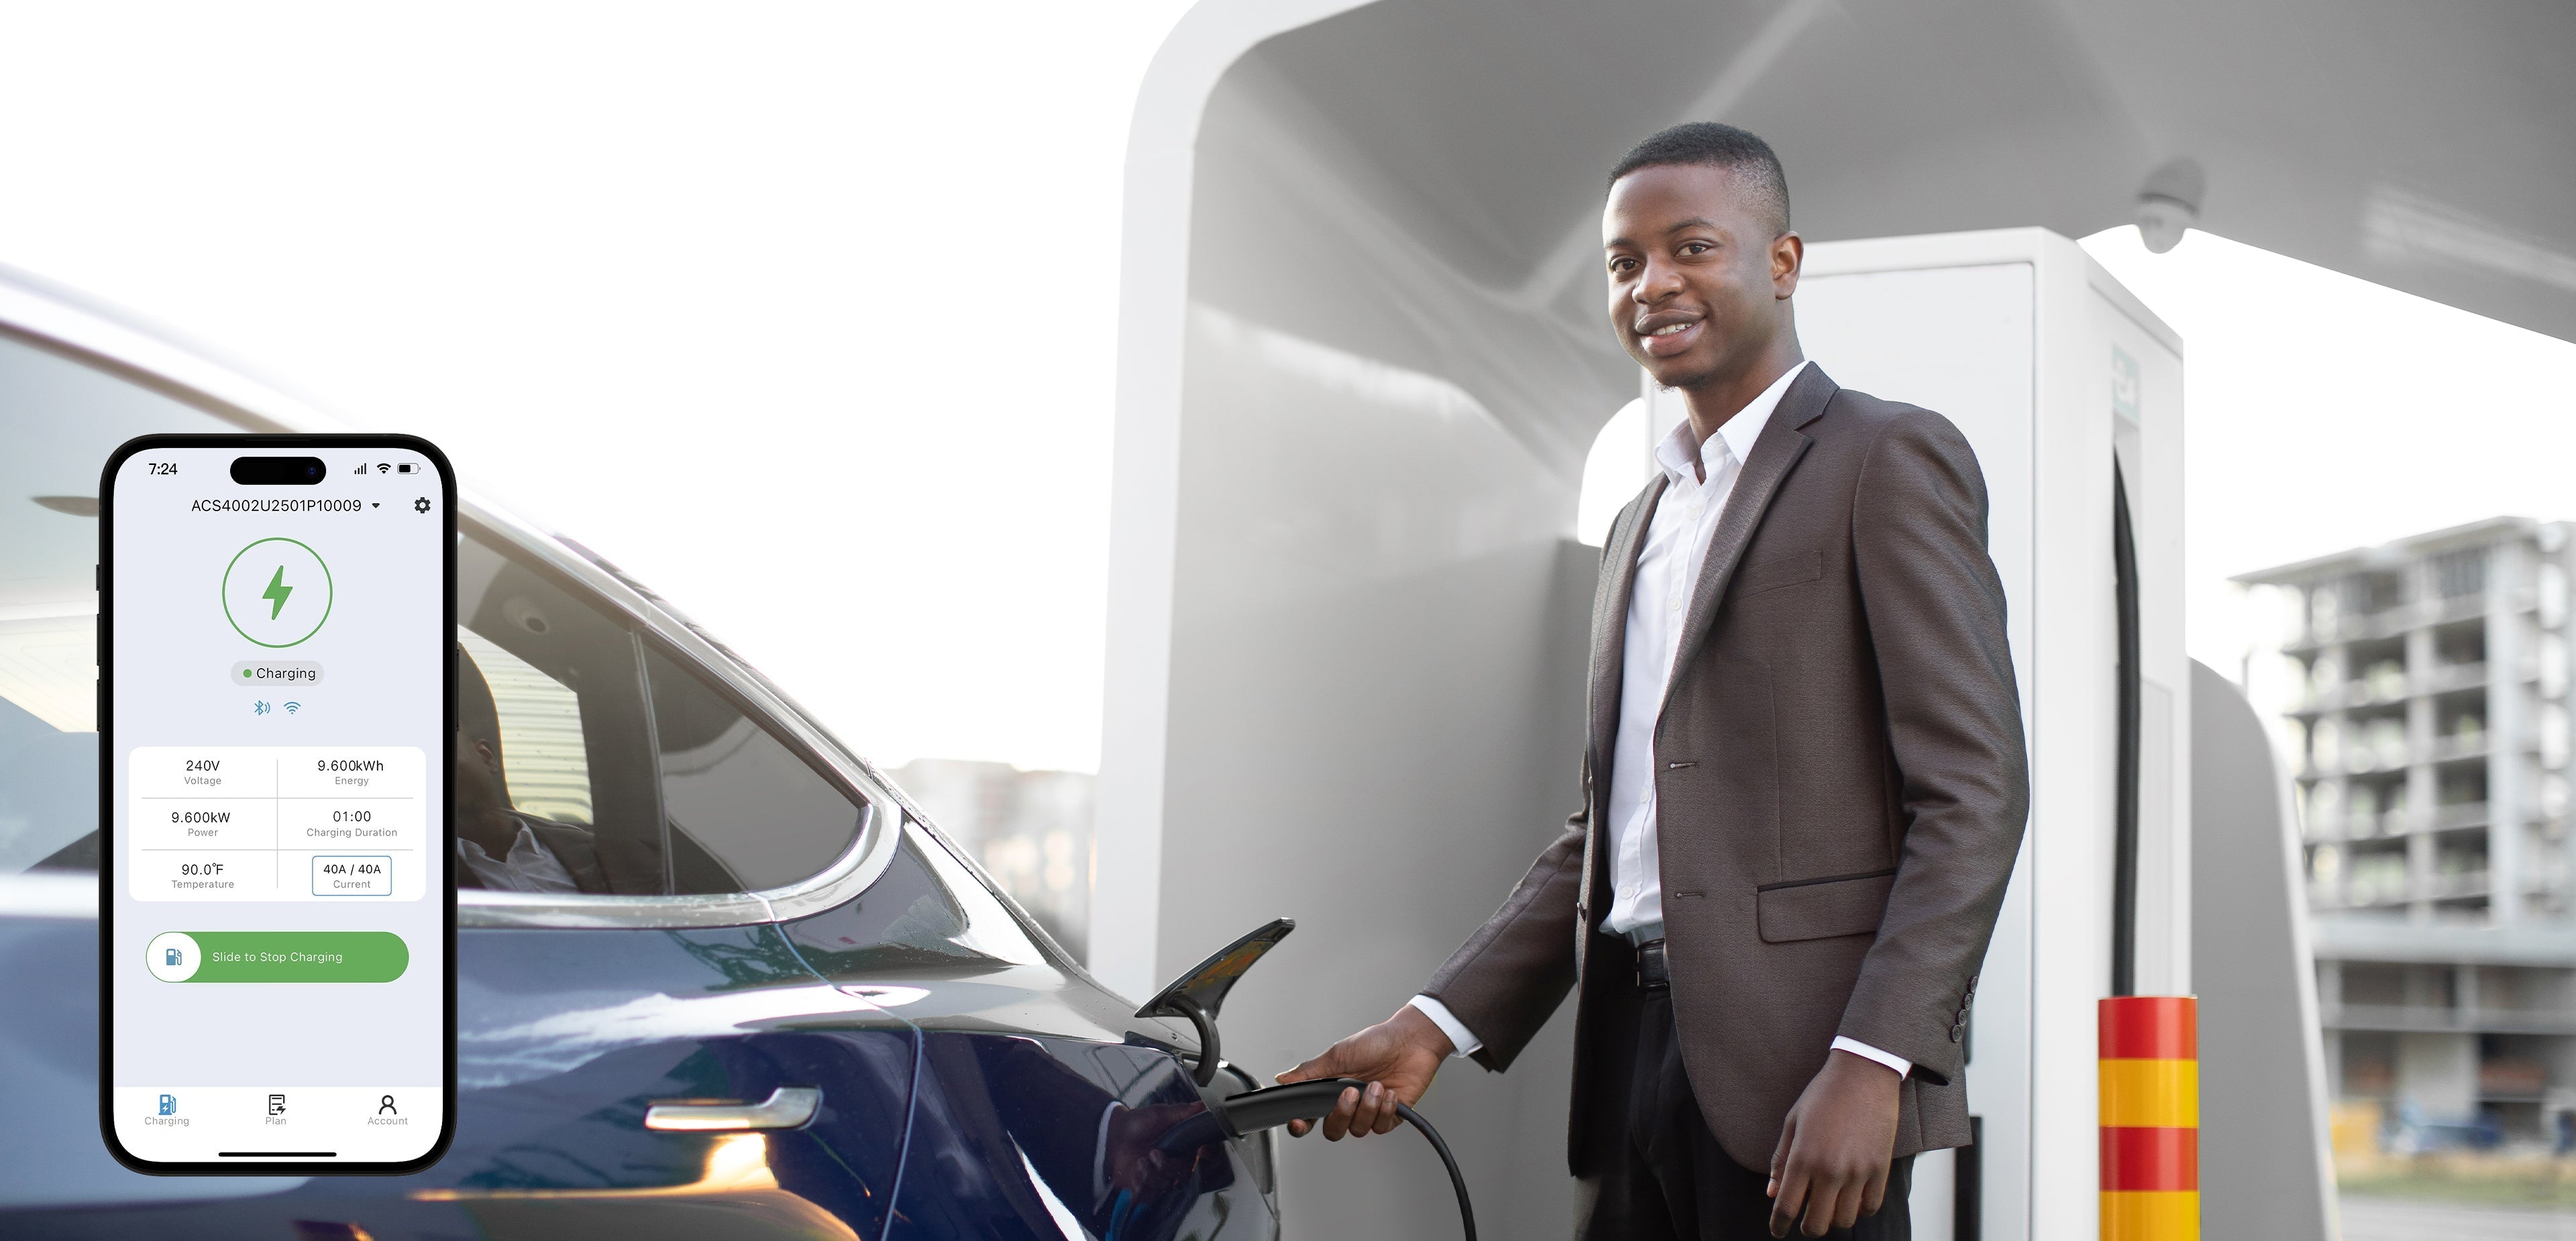
Schritt 4: Ladestatus bestätigen
-
Das Armaturenbrett oder die App des Fahrzeugs sollte den Ladevorgang anzeigen
-
Die meisten Ladegeräte verfügen über LED-Statusleuchten (grün = Laden; rot = Fehler).
Schritt 5: Erste Sitzung überwachen
Für Ihre ersten paar Ladungen:
-
Überprüfen Sie, ob sich die Zündkerze erhitzt oder ungewöhnliche Geräusche auftreten.
-
Stellen Sie sicher, dass der Leistungsschalter nicht auslöst
-
Notieren Sie, wie viel Ladung über Nacht hinzugefügt wird, um Ihren Bedarf zu ermitteln
4. Benötigen Sie einen Elektriker?
Für die meisten Level-1-Setups ist kein Elektriker erforderlich , wenn:
-
Ihr Haus verfügt über eine geerdete 120-V-Steckdose
-
Der Stromkreis ist nicht überlastet
-
Das Ladegerät ist tragbar und UL-zertifiziert
Sie sollten einen Elektriker beauftragen, wenn:
-
Sie möchten eine neue Steckdose in der Nähe Ihres Parkplatzes installieren
-
Sie sind sich über die Stromkreisbelastung oder Erdung nicht sicher
-
Sie bevorzugen eine fest montierte Lösung
🧠 Erkenntnis: Viele Besitzer von Elektrofahrzeugen der Stufe 1 rüsten später auf Ladevorgänge der Stufe 2 auf. Wenn Sie eine neue Steckdose hinzufügen, sollten Sie für die zukünftige Verwendung die Installation einer 240-V-Leitung ( NEMA 14-50 ) in Betracht ziehen.
5. Sicherheitstipps für Erstbenutzer
-
Verwenden Sie niemals Verlängerungskabel, es sei denn, sie sind EV-zertifiziert und UL-geprüft
-
Schließen Sie keine Mehrfachsteckdosen aneinander an.
-
Überprüfen Sie die Kabel regelmäßig auf Ausfransungen oder Verschleiß
-
Ziehen Sie bei Gewitter den Stecker, um Überspannungsschäden zu vermeiden
-
Im Zweifelsfall wenden Sie sich an einen qualifizierten Elektriker
6. Was ist, wenn Sie in einer Wohnung oder einem Gemeinschaftsparkplatz wohnen?
Tolle Neuigkeiten: Ladegeräte der Stufe 1 sind die beste Lösung für Mieter und gemeinsam genutzte Räume, weil sie:
-
Keine Panel-Upgrades erforderlich
-
Arbeiten Sie mit vorhandenen Außensteckdosen
-
Kann bei einem Umzug mitgenommen werden
📌 Tipp: Bitten Sie Ihren Vermieter, eine wetterfeste Steckdose in der Nähe Ihres Parkplatzes zu installieren. Die meisten sind dazu bereit, wenn ihnen klare Vorteile und Daten genannt werden.
7. Installationskosten
| Artikel | Geschätzte Kosten |
|---|---|
| EVSE-Ladegerät der Stufe 1 | 180–400 US-Dollar |
| Elektrikerbesuch (optional) | 150–300 US-Dollar |
| Neue Steckdoseninstallation | 100–250 US-Dollar |
| Wetterfeste Abdeckung (falls erforderlich) | 15–25 $ |
💡 Gesamtkosten für die meisten Hausbesitzer: Oft 0–400 $, wenn keine neue Steckdose benötigt wird.
8. Wie lange dauert das vollständige Aufladen?
Folgendes können Sie beim Laden der Stufe 1 erwarten:
| EV-Modell | Batteriegröße | Zeit bis 100 % (ca.) |
|---|---|---|
| Tesla Modell 3 | 57,5 kWh | 30–36 Stunden |
| Chevy Bolt | 65 kWh | 35–40 Stunden |
| Nissan Leaf | 40 kWh | 20–24 Stunden |
| Ford Mustang Mach-E | 91 kWh | 45–55 Stunden |
✅ Bester Anwendungsfall: Aufladen über Nacht oder täglicher Pendelbedarf unter 40 Meilen/Tag.
9. Zukunftssicherheit: Benötigen Sie später Level 2?
Viele Benutzer beginnen mit Level 1 und steigen dann auf Level 2 auf, nachdem:
-
Solarmodule besorgen
-
Erhöhung der täglichen Kilometerleistung
-
Kauf eines zweiten Elektrofahrzeugs
🔄 Kluge Wahl: Wählen Sie ein Kombi-Ladegerät der Stufe 1/2 , das sowohl 120-V- als auch 240-V-Eingänge unterstützt (wie einige EVDANCE-Modelle).
10. Häufige Fehler beim ersten Mal, die Sie vermeiden sollten
| Fehler | Lösung |
|---|---|
| Verwendung von ausschließlich für den Innenbereich vorgesehenen Ladegeräten im Freien | Kaufen Sie ein wetterfestes IP65-Ladegerät |
| Anschließen an überlastete Stromkreise | Testen Sie die Schaltungslast vor der Verwendung |
| Schnelles Aufladen über Nacht erwartet | Verstehen Sie die Grenzwerte der Stufe 1 |
| Auslassinspektion überspringen | Verwenden Sie vor der Verwendung einen Stromkreistester |
| Den Vermieter nicht um Erlaubnis fragen | Präsentieren Sie einen Nutzungsvorteilsvorschlag |
Fazit: Level-1-Laden kann einfach, sicher und kostengünstig sein
Sie benötigen keine Hightech-Garage oder teure Upgrades, um mit dem Elektroautofahren zu beginnen. Eine einfache 120-V-Steckdose und ein hochwertiges Level-1-Ladegerät reichen für viele Erstnutzer aus – insbesondere für diejenigen mit kurzen Arbeitswegen, planbaren Zeitplänen oder begrenztem Ladebedarf.
Wenn Sie die Schritte in diesem Handbuch befolgen, gewährleisten Sie eine sichere, zuverlässige und kostengünstige Einrichtung und sind gleichzeitig auf zukünftige Upgrades vorbereitet.
Aktie:
Kann ich dieses Ladegerät mit meinem Elektrofahrzeug verwenden? Kompatibilitätsprobleme für Erstbesitzer eines Elektrofahrzeugs werden gelöst
Kompatibilität von Elektrofahrzeugsteckern verstehen: Ein Leitfaden für Erstbesitzer von Elektrofahrzeugen